

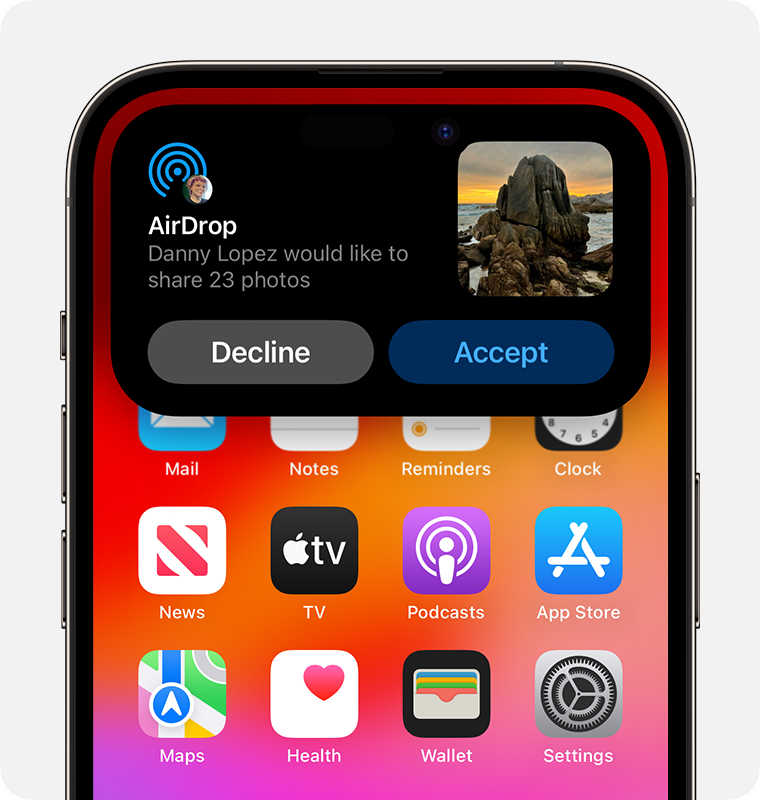
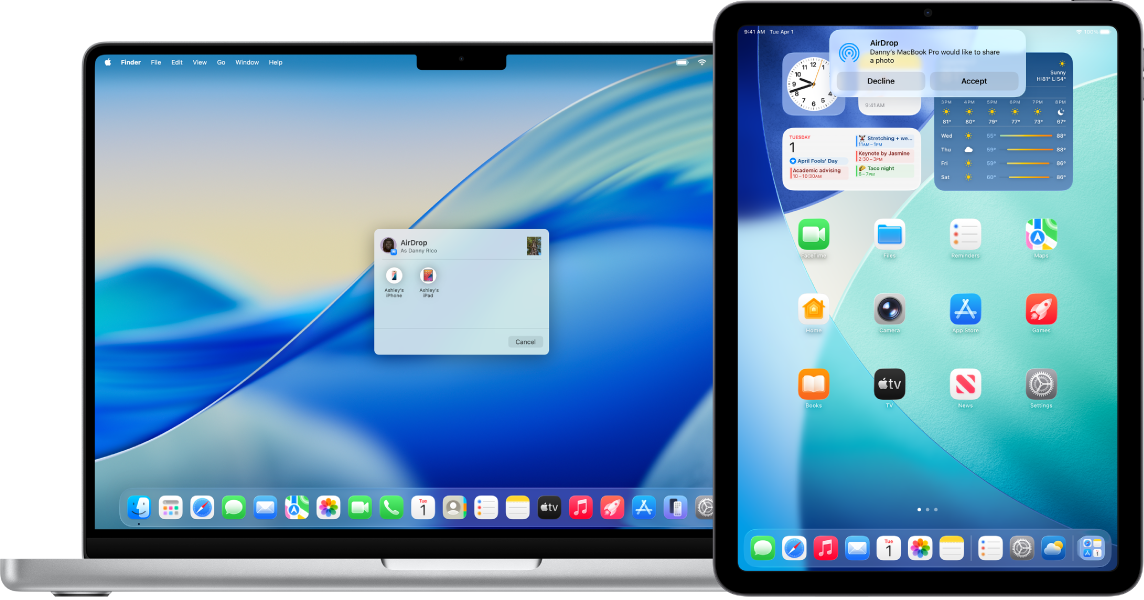
AirDrop is one of Apple’s most convenient features, allowing users to quickly share photos, files, and other content between iPhones, iPads,
AirDrop is one of Apple’s most convenient features, allowing users to quickly share photos, files, and other content between iPhones, iPads, and Macs. However, there are times when you might want to stop or revoke AirDrop sharing. Whether it’s for privacy concerns, accidental sharing, or device security, knowing how to cancel AirDrop is essential.
In this comprehensive guide, we’ll explore what AirDrop is, common reasons to cancel it, step-by-step instructions on various devices, and tips to manage AirDrop effectively.
What is AirDrop?
AirDrop is a feature built into Apple devices that allows wireless transfer of files using Bluetooth and Wi-Fi. It’s fast, easy, and doesn’t require third-party apps. Users can share:
- Photos and videos
- Documents and PDFs
- Contacts and links
- App data and other supported files
AirDrop works between iPhones, iPads, and Macs, provided the devices are within close proximity and both have AirDrop enabled.
Why You Might Want to Cancel AirDrop
While AirDrop is convenient, there are several scenarios where you might need to cancel it:
- Privacy Concerns: You may receive files from unknown users in public places if AirDrop is set to “Everyone.”
- Accidental Sharing: Sending files to the wrong person is easy when multiple devices are nearby.
- Security: Limiting AirDrop can prevent exposure to inappropriate or harmful content.
- Battery and Performance: Keeping AirDrop active can slightly affect battery life due to continuous Bluetooth and Wi-Fi usage.
Understanding these reasons highlights why it’s important to know how to cancel AirDrop when needed.
How to Cancel AirDrop on iPhone and iPad
AirDrop on iOS devices can be turned off or restricted through settings or the Control Center. Here’s how:
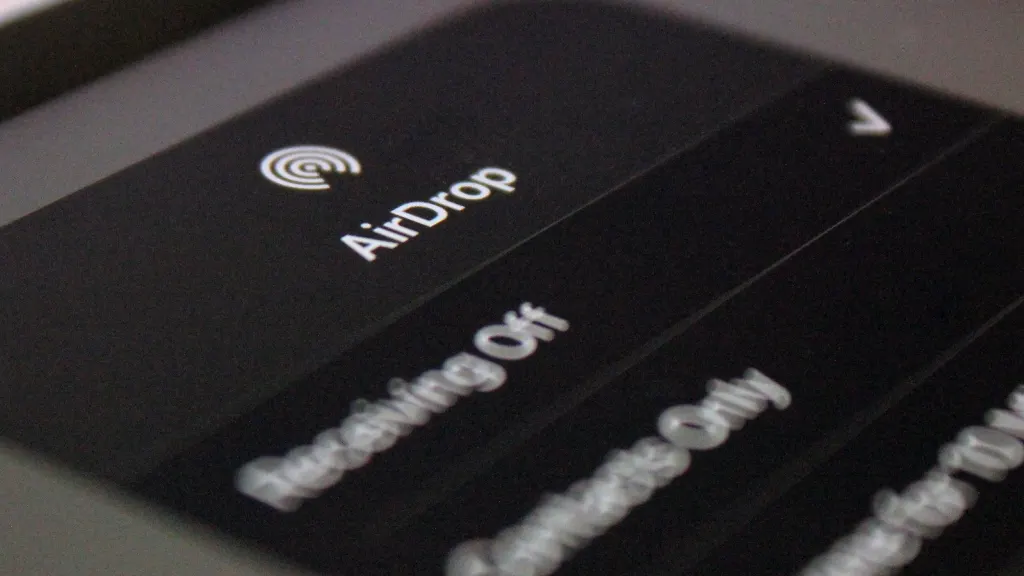
Method 1: Using Control Center
- Swipe down from the top-right corner of the screen (iPhone X and later) or swipe up from the bottom (iPhone 8 and earlier).
- Press and hold the network settings card (the section with Wi-Fi, Bluetooth, and Airplane Mode).
- Tap AirDrop.
- Choose Receiving Off to completely stop AirDrop from receiving files.
Method 2: Using Settings
- Open the Settings app on your iPhone or iPad.
- Tap General.
- Select AirDrop.
- Choose Receiving Off to disable AirDrop entirely.
By following either of these methods, you can prevent anyone from sending files to your device and fully cancel AirDrop functionality.
How to Cancel AirDrop on Mac
For Mac users, AirDrop can also be disabled or restricted to contacts only:
Method 1: Using Finder
- Open Finder.
- In the sidebar, select AirDrop.
- At the bottom of the AirDrop window, click Allow me to be discovered by:
- Select No One to cancel AirDrop and prevent incoming files.
Method 2: Using System Preferences
- Open System Preferences.
- Click Sharing.
- Uncheck the AirDrop option if it appears, or ensure Allow me to be discovered by is set to No One.
This ensures that your Mac will not appear to nearby devices, effectively canceling AirDrop.
How to Cancel an Ongoing AirDrop Transfer
Sometimes you may start sending a file accidentally and need to stop it immediately. Here’s how:
On iPhone and iPad
- While the file is transferring, a progress bar will appear on your screen.
- Tap Cancel next to the file to stop the AirDrop immediately.
On Mac
- When sending a file, you can click the x or Cancel button in the AirDrop progress window to halt the transfer.
By knowing how to cancel AirDrop mid-transfer, you can prevent files from going to unintended recipients.
Adjusting AirDrop Settings for Better Control
If you don’t want to fully cancel AirDrop but want more control:
- Contacts Only: Restrict AirDrop so only your contacts can send you files. This reduces unwanted sharing in public areas.
- Temporary Activation: Only turn on AirDrop when needed and turn it off afterward.
- Airplane Mode: Activating Airplane Mode will temporarily cancel AirDrop along with other wireless features.
These strategies allow you to enjoy AirDrop when necessary while maintaining privacy and security.
Troubleshooting AirDrop Issues
Even if AirDrop is not canceled, some users experience issues. Common problems include:
- Device Not Discoverable: Ensure AirDrop is set to Contacts Only or Everyone.
- Wi-Fi or Bluetooth Off: Both must be enabled for AirDrop to work.
- Proximity Issues: Devices should be within 30 feet (9 meters) of each other.
- Firewall Settings on Mac: Ensure AirDrop is allowed through the firewall.
By understanding these troubleshooting steps, you can manage AirDrop more effectively without needing to cancel it unnecessarily.
Safety Tips When Using AirDrop

While learning how to cancel AirDrop is important, using it safely is equally critical:
- Limit Visibility: Set AirDrop to Contacts Only to avoid receiving files from strangers.
- Monitor Transfers: Always accept files from trusted sources.
- Turn Off When Not Needed: This prevents unwanted files and potential malware.
- Keep iOS/macOS Updated: Updates often include security improvements for AirDrop.
Following these practices ensures that AirDrop remains a safe and convenient tool.
Conclusion
Knowing how to cancel AirDrop is essential for anyone using Apple devices. Whether it’s for privacy, security, or controlling accidental sharing, disabling AirDrop or stopping ongoing transfers gives you control over your device.
By mastering AirDrop settings on iPhone, iPad, and Mac, you can enjoy the convenience of quick file sharing while maintaining your privacy and safety. Remember to adjust AirDrop visibility based on your location and turn it off when it’s not needed.
AirDrop is a powerful feature, but the ability to cancel or control it ensures that your digital life remains secure and stress-free.
COMMENTS